No products in the cart.
Return To Shop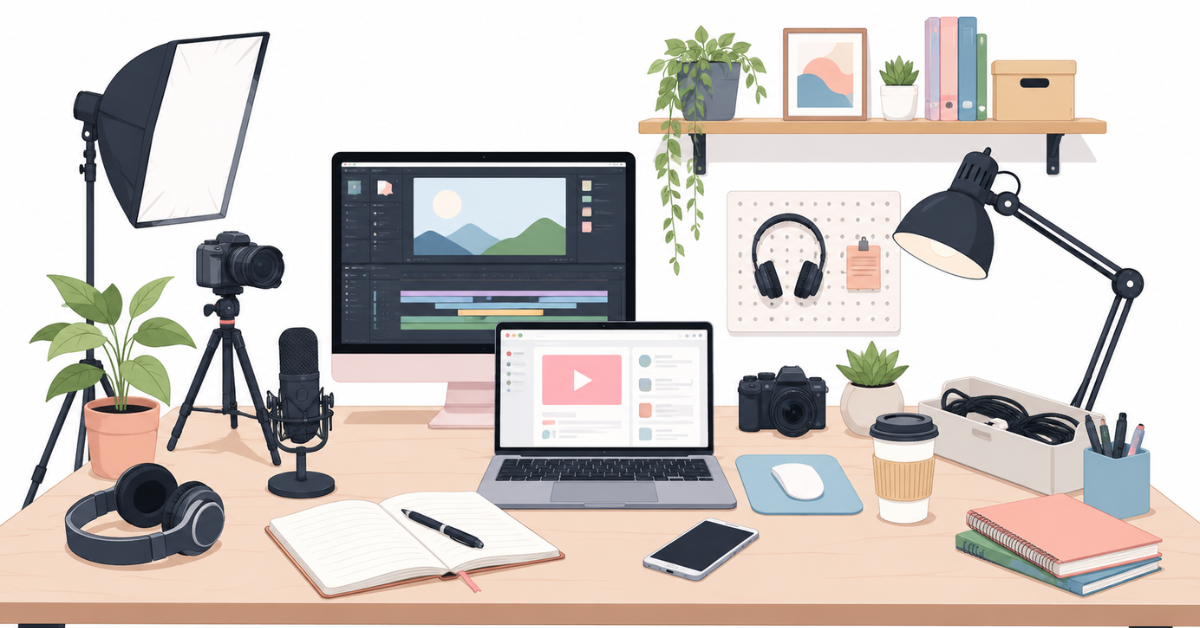
How to Build a Content Creator Setup That Actually Works
A content creator setup doesn’t have to be expensive, complicated, or packed with equipment to be effective. What matters most is whether your workspace makes it easier to do the work you actually spend your time doing—whether that’s filming videos, editing, writing, designing, recording podcasts, or managing content for multiple platforms.
The best setup is built around your workflow, not a shopping list. A carefully arranged desk, comfortable workspace, reliable computer, good lighting, and sensible organization can make a bigger difference than simply adding more gear.
Whether you’re creating from a dedicated home office, a bedroom corner, or a small desk, the goal is the same: build a space that helps you focus, stay organized, and create consistently.
In this guide, we’ll look at the essential parts of a content creator setup, how to organize different work zones, how to adapt your workspace to different types of creators and spaces, and how to build your setup gradually without buying things you don’t really need.
Start With Your Content Creation Workflow
Before you buy another piece of equipment or rearrange your desk, take a moment to think about how you actually create. A YouTuber filming in the same room every week has different needs from a video editor working through client projects, a designer building graphics, or a freelancer switching between several types of creative work.
Your setup should support those routines rather than forcing you to work around the space.
What Do You Create?
Start by identifying the type of content you produce most often. Video creators may need room for cameras, lighting and recording equipment, while editors and designers may care more about monitor space, comfortable seating and an efficient computer workstation. Writers, podcasters and social media creators may need a simpler arrangement focused on writing, recording or planning.
You don’t need to build for every possible type of content. Build around the work you actually do most.
How Do You Work?
Next, consider what your typical workday looks like.
Do you spend hours editing? Film regularly? Write scripts and captions? Move between research, planning and publishing? Record audio? Manage several projects at once?
These details determine which parts of your setup deserve the most attention. A good content creation setup should reduce friction between tasks, so the tools you use most are easy to reach and your workspace doesn’t constantly get in the way.
What Does Your Current Space Allow?
Finally, work with the space you have.
A dedicated room gives you more flexibility, but a bedroom corner, dining table or compact desk can work surprisingly well when organized thoughtfully. You don’t need to recreate someone else’s studio to have a productive creator workspace.
The goal isn’t to build the biggest setup possible. It’s to make the space you already have work better for you.
The Essential Parts of a Content Creator Setup
Once you understand how you work, you can start building the physical setup around those needs. You don’t need every piece of creator equipment available. Instead, focus on the elements that make your everyday workflow more comfortable, organized, and efficient.
Desk and Work Surface
Your desk is the foundation of the setup because most of your creative work happens there. Choose a surface that gives you enough room for your computer, monitor, notebook, and the equipment you use regularly without becoming overcrowded.
If you frequently switch between editing, writing, and recording, a little extra workspace can make those transitions much easier. At the same time, a smaller desk can work perfectly well if you keep only your most-used tools within reach.
The goal is simple: enough space to work comfortably without allowing the desk to become a storage area.
Computer and Monitor Setup
For many creators, the computer is the most important piece of equipment in the workspace. The right setup depends heavily on what you create and which software you use.
Video editors and designers may benefit from a larger monitor or a second display, while writers and social media creators may be perfectly comfortable with a laptop. If you regularly work across multiple applications, additional screen space can also make research, editing, and content management easier.
Prioritize reliability and comfort over specifications you are unlikely to use.
Chair and Ergonomics
A creator workspace is somewhere you may spend several hours a day, so comfort shouldn’t be treated as an afterthought.
Your chair, desk height, monitor position, and keyboard and mouse placement all affect how comfortably you can work over long sessions. Your screen should be positioned at a comfortable viewing height, and your workspace should allow you to sit naturally rather than constantly leaning or reaching.
A productive setup is one you can actually sit at for hours without feeling like your body is fighting the workspace.
Lighting
Good lighting matters for more than making a workspace look attractive.
If you create video content, consistent lighting can improve the appearance of your recordings. Even when you’re not filming, a well-lit workspace can make the environment feel more comfortable and inviting.
Natural light can be a great starting point. If your workspace has limited daylight, a desk or adjustable light can help you maintain a more consistent environment.
You don’t necessarily need a complicated lighting system. Good placement and consistency often matter more than having lots of lights.
Camera or Phone Position
If you regularly film videos, tutorials, reels, or other visual content, think about where your camera or phone will live when you’re recording.
A dedicated position can save time because you don’t have to rebuild your setup every time you want to create something. Depending on your space, this could mean a tripod beside your desk, a phone stand on the desktop, or a more permanent camera position.
Try to make the recording position easy to access while keeping it out of the way when you’re working on other tasks.
Microphone and Audio
Good audio can be just as important as good video, particularly for talking-head videos, tutorials, podcasts, and voiceovers.
Your microphone doesn’t need to dominate the desk. The important thing is that it is appropriate for the type of content you create and positioned consistently when you’re recording.
Also consider the room itself. Hard surfaces and background noise can affect recordings, so improving the environment around the microphone may sometimes be more useful than simply buying a more expensive one.
Background and Visual Environment
For creators who appear on camera, the space behind the desk can become part of the content.
A clean wall, bookshelf, plant, artwork, or a few carefully chosen personal items can create a more intentional background without making the room feel staged. Your workspace should still feel like a place where you actually work rather than a permanent studio set.
This is also where your personality can come through. A few meaningful details can make a creator workspace feel distinctly yours.
Storage and Cable Management
As your setup grows, so does the number of cables, accessories, memory cards, notebooks, chargers, and other small pieces of equipment.
Without a simple storage system, even a well-designed workspace can quickly become cluttered. Keep frequently used equipment close by, give less-used items a designated storage spot, and use cable management wherever possible.
A clean workspace isn’t just about appearance. When you know where everything belongs, you spend less time looking for things and more time creating.
Design Your Workspace Around Different Creator Tasks
A content creator’s workspace rarely has just one purpose. You might spend the morning planning content, the afternoon editing a video, and the evening recording or publishing. Trying to do everything from the same cluttered surface can make simple transitions feel unnecessarily difficult.
Instead of thinking about your workspace as one large desk, it can help to think in terms of different work zones. These don’t have to be separate rooms or even separate pieces of furniture. In a small workspace, several zones can comfortably share the same area.
The Work & Editing Zone
This is where you’ll probably spend the largest part of your day.
Your computer, monitor, keyboard, mouse, notebook, and other frequently used tools should be arranged so that you can work comfortably without constantly moving things around. If editing is a major part of your workflow, give your computer and monitor enough space and keep distractions to a minimum.
The goal is to create a reliable base where you can sit down and get straight into the work.
The Recording Zone
If you regularly create videos, reels, tutorials, or other visual content, having a consistent recording position can save a surprising amount of time.
Your camera or phone, lighting, microphone, and background should be easy to set up—or ideally remain ready to use. You don’t necessarily need a permanent studio. Even a small corner can become a practical recording zone when everything has a predictable position.
This is where a design like Just One More Take can naturally reflect the realities of a creator’s workflow: sometimes the recording process takes a little longer than expected, and your workspace needs to accommodate that process.
The Equipment Zone
Creator equipment tends to accumulate quickly. Cameras, tripods, microphones, headphones, cables, chargers, memory cards, and other accessories can easily take over a desk if they don’t have designated places.
Create a simple equipment zone for the things you use regularly but don’t need sitting in front of you all day. Shelves, drawers, boxes, or dedicated storage containers can all work.
The important part is being able to find what you need without searching through a pile of equipment every time you start a project.
The Storage Zone
Not everything needs to be within arm’s reach.
Less frequently used equipment, spare cables, older projects, stationery, packaging, and other supplies should have a clear home outside your primary work area. This keeps the main workspace open and makes it easier to reset your desk at the end of the day.
A well-designed creator workspace isn’t necessarily the one with the most equipment on display. It’s the one where everything has a place and the tools you need are available when you need them.
Content Creator Setup Ideas for Different Spaces
Not every creator has a spare room waiting to become a studio. Many people start with a corner of a bedroom, a compact desk, a shared home office, or whatever space is available.
The good news is that a useful creator setup doesn’t depend on having a large room. The right layout can make a small or shared space work surprisingly well.
Small Desk Creator Setup
A small desk can be enough for content creation when you prioritize the equipment you actually use.
Keep your computer, monitor, keyboard, and other daily essentials within easy reach, while moving less frequently used equipment into drawers, shelves, or nearby storage. A laptop stand or compact monitor arrangement can also help free up valuable desk space.
For smaller setups, the biggest improvement often comes from reducing what stays on the desk, rather than trying to fit more onto it.
Bedroom Creator Setup
A bedroom can double as a creative workspace without needing to look like a full production studio.
Choose one area of the room as your primary work zone and keep the boundaries clear. A compact desk, comfortable chair, practical lighting, and organized storage can create a dedicated place for editing, planning, or recording without taking over the entire room.
If you also film in the bedroom, think carefully about what’s visible behind you. A tidy background and a few intentional personal details can make the space feel natural while still looking good on camera.
Home Office Creator Setup
If you already have a dedicated home office, you have more flexibility to separate different parts of your workflow.
You might use the main desk for editing and administration while keeping a nearby area ready for recording. Shelving can hold equipment and supplies, while your primary work surface stays relatively clear.
This kind of arrangement works particularly well when content creation is a regular part of your working week rather than an occasional activity.
Shared Workspace Setup
A shared workspace needs to work for more than one person or purpose, so flexibility becomes especially important.
Choose equipment that can be packed away easily and avoid permanently occupying more space than you need. A notebook, headphones, compact lighting, or a portable phone stand can make it easier to switch into creator mode without taking over the entire room.
The key is to create a setup that can transition between content creation and everyday work without becoming a permanent obstacle for everyone else.
Dedicated Creator Room
If you have a room specifically for content creation, you can design it around your complete workflow rather than fitting your workflow into an existing space.
Consider where you’ll work, record, store equipment, and potentially photograph or film products. You can also create a more intentional visual environment with artwork, plants, shelving, or other elements that reflect your creative identity.
But even with a dedicated room, resist the temptation to fill every available surface. More space should give you more flexibility, not more clutter.
Setup Ideas for Different Types of Creators
There is no single ideal content creator setup because the work itself can look very different from one creator to another. A YouTuber who spends hours filming has different priorities from a video editor, while a social media creator may need to move quickly between planning, creating, editing, and publishing.
The best approach is to adapt the workspace to the type of content you create most often.
YouTube Creator Setup
A YouTube-focused workspace needs to support both production and the work that happens before and after filming.
A practical setup might include a comfortable editing station, a reliable camera or phone position, consistent lighting, a microphone, and enough space to keep recording equipment accessible. If you regularly appear on camera, the background deserves attention too.
You don’t need a permanent studio to create a good YouTube setup. What matters is having a repeatable arrangement that lets you move from planning to recording to editing without rebuilding your workspace every time.
Video Editing Setup
If editing takes up most of your working day, your computer and monitor arrangement should be the priority.
A comfortable chair, a suitable display, an organized keyboard and mouse setup, and easy access to headphones or other frequently used tools can make long editing sessions much easier. Keeping unnecessary equipment away from the main work surface can also reduce distractions.
A design such as My Cardio Is Editing fits naturally into this environment because editing is not just one task in a creator’s workflow—it can be where hours of the day disappear.
Social Media Creator Setup
Social media creators often move between several different tasks: researching ideas, writing captions, creating visuals, recording short-form content, editing, scheduling, and responding to their audience.
A flexible setup works particularly well here. Keep the tools you use most often accessible, maintain enough clear desk space to switch between tasks, and avoid creating a setup that only works for one type of content.
A simple notebook can also have a surprisingly useful role for capturing ideas, hooks, content concepts, and quick notes before they disappear.
Freelance Creator Setup
Freelance creators often have to manage both creative work and the business side of their workday.
Your workspace may need to support client communication, research, planning, editing, design, invoicing, and project management alongside content creation. Keeping your primary work area organized becomes especially important when you’re switching between several projects.
A flexible setup that allows you to move between creative and administrative tasks without constantly rearranging your desk can make the entire workday feel more manageable.
And sometimes the reality of that workflow is perfectly captured by The Algorithm Fears Consistency—because creating content consistently is often less about having a perfect setup and more about building a workspace that makes it easier to keep showing up.
How to Keep Your Creator Workspace Organized
A creator workspace can become cluttered faster than you might expect. One project brings a camera and tripod onto the desk, another adds notebooks and cables, and before long, the workspace you designed to help you focus becomes another source of distraction.
The solution isn’t necessarily more storage. It’s creating a simple system that makes it easy to put things away and keep your most important tools accessible.
Keep Frequently Used Equipment Accessible
The equipment you use every day shouldn’t require a search mission every time you need it.
Keep frequently used items such as headphones, notebooks, microphones, chargers, or recording accessories within easy reach. Less frequently used equipment can be stored elsewhere.
This small distinction helps keep your workspace practical without leaving everything permanently spread across the desk.
Control Cable Clutter
Cables are one of the easiest ways for a creator workspace to become messy.
Computer cables, charging leads, microphone cables, camera connections, and other accessories can quickly become tangled together. Simple cable clips, ties, or routing systems can keep them under control and make it easier to identify the cable you need.
A cleaner cable setup also makes it easier to rearrange your workspace when your workflow changes.
Give Equipment a Permanent Home
Every piece of equipment doesn’t need to live on your desk.
Give cameras, tripods, headphones, spare cables, memory cards, and other accessories a designated place. That might be a drawer, shelf, cabinet, storage box, or another nearby location.
When something has a home, tidying up becomes much easier because you’re not deciding where to put it every time.
Keep the Desk Clear Between Projects
One of the simplest habits you can develop is resetting your workspace when you finish a project.
Put equipment away, remove unnecessary items, return notebooks and accessories to their usual positions, and leave enough clear space for the next task.
This is especially useful when you’re working on multiple projects at once. A clean starting point can make it easier to focus on the next piece of work instead of carrying yesterday’s clutter into today’s session.
Your creator workspace doesn’t have to stay perfectly tidy all day. It just needs to be easy to reset.
Build Your Content Creator Setup in Stages
You don’t have to create your ideal content creator setup all at once. In fact, trying to buy everything from the beginning can make the process more expensive and complicated than it needs to be.
A better approach is to build the workspace gradually, starting with the things that have the biggest impact on your everyday work and adding upgrades as your needs become clearer.
Stage 1: Get the Essentials Right
Start with the basics you use every day: a comfortable workspace, reliable computer, suitable desk, good seating, and the equipment required for the type of content you create.
At this stage, focus on removing obvious problems rather than chasing perfection. If your desk is uncomfortable or your computer struggles with your workload, another decorative accessory probably isn’t going to improve your workflow.
Stage 2: Improve Your Workflow
Once the foundation works, look for small changes that save time.
Better cable management, more accessible storage, a second monitor, improved lighting, or a dedicated place for recording equipment can make everyday tasks smoother.
This is also when you start noticing which parts of your setup slow you down repeatedly. Those are usually the areas worth improving first.
Stage 3: Upgrade Quality
After your workflow is working well, you can invest in equipment that improves the quality of your output.
That might mean upgrading your microphone, camera, lighting, monitor, computer, or other tools that directly affect the content you produce.
The important thing is to upgrade because your work has outgrown the current equipment, rather than because someone else’s setup looks impressive.
Stage 4: Add Personality and Convenience
Once the functional parts are working, you can make the workspace feel more like your own.
Artwork, a favorite mug, a notebook, stickers, plants, or other personal touches can make the environment more enjoyable without interfering with the workflow.
This is where something like Will Edit for Coffee can fit naturally into a creator workspace—it adds personality while still reflecting the reality of the work.
The best setup usually evolves alongside the creator. You don’t need to predict everything you’ll ever need. Build for today’s workflow, then improve it as your work changes.
Common Content Creator Setup Mistakes
Building a creator workspace is exciting, but it’s also easy to focus on what looks impressive rather than what actually makes your work easier. A few common mistakes can turn a promising setup into an expensive or uncomfortable workspace.
Buying Gear Before Understanding Your Workflow
It’s tempting to start with the equipment you see other creators using. But someone else’s setup may be designed around a completely different type of content.
Before buying anything, identify the tasks you perform most often and the problems you’re trying to solve. A piece of equipment is worth adding when it addresses a real need in your workflow.
Trying to Fit Too Much on One Desk
More equipment doesn’t automatically mean a better setup.
A desk covered with monitors, microphones, cameras, notebooks, accessories, and cables can leave you with very little room to actually work. Keep the tools you use regularly within reach and move everything else into organized storage.
A little empty space can be just as valuable as another piece of equipment.
Ignoring Lighting and Audio
Creators sometimes concentrate heavily on cameras and computers while overlooking two things that have a major effect on the finished content: light and sound.
You don’t necessarily need expensive equipment, but you do need to consider whether your recording environment provides consistent lighting and reasonably clean audio.
Improving the environment around your existing equipment can sometimes produce a bigger improvement than immediately upgrading the equipment itself.
Neglecting Ergonomics
Content creation can involve long periods at a desk, particularly when editing, writing, designing, or managing multiple projects.
An uncomfortable chair, poorly positioned monitor, or awkward keyboard and mouse placement can make those hours much harder than they need to be.
Your workspace should support your body as well as your workflow. Comfort isn’t a luxury when you’re going to spend a significant part of your day there.
Designing for Appearance Instead of Function
A visually impressive creator setup can be great inspiration, but a workspace shouldn’t become a photo backdrop that happens to contain a desk.
Think about how easily you can sit down, start working, access your equipment, switch between tasks, and reset the space when you’re finished.
A beautiful workspace that slows you down isn’t a successful workspace.
Buying Equipment You Rarely Use
One of the easiest ways to create clutter is buying something because it might be useful someday.
If a piece of equipment spends most of its life sitting in a box or taking up valuable desk space, it probably doesn’t belong in your everyday setup.
Build around your actual workflow first. You can always add something later when your content, workload, or creative process gives you a genuine reason to need it.
Content Creator Setup Buying Guide
Once your workspace is functional, it becomes much easier to decide where your money is actually worth spending. Instead of trying to build the perfect setup in one purchase, prioritize the things that directly improve your ability to create.
What to Prioritize First
Start with the equipment and workspace elements that affect your everyday workflow.
A reliable computer, comfortable desk and chair, appropriate lighting, and the basic recording or editing equipment you genuinely need should come before decorative upgrades or specialized accessories.
Ask yourself a simple question before buying:
Will this make something I do regularly easier, faster, more comfortable, or better?
If the answer is no, it probably doesn’t need to be a priority.
Where to Spend More
Spend more when an item is central to your work and you’ll use it consistently.
For a video editor, that might mean a computer and monitor that can comfortably handle editing. For a video creator, it could mean investing in equipment that noticeably improves recording quality. For someone working long hours at a desk, comfort and ergonomics may deserve more attention.
Your priorities should follow your workload, not someone else’s equipment list.
Where You Can Keep Things Simple
Not every part of your setup needs to be expensive.
A simple notebook can handle content ideas and planning. A well-positioned lamp can provide useful lighting. Basic storage can keep equipment organized. A small desk can work perfectly well when you don’t overload it.
Even personality doesn’t have to come with a large budget. A few carefully chosen details can make your workspace feel more like your own.
The goal isn’t to spend the most. It’s to spend where it actually improves the way you create.
Frequently Asked Questions
What does a content creator need for a basic setup?
A basic content creator setup can be surprisingly simple. Start with a comfortable workspace, a reliable computer, suitable lighting, and the equipment required for the type of content you create. From there, add tools based on actual workflow needs rather than trying to purchase everything at once.
How do I create a content creator workspace?
Start by identifying the tasks you perform most often and arrange your workspace around them. Keep frequently used equipment accessible, create designated areas for recording and editing where possible, manage cables, and give less frequently used equipment a permanent storage location.
How do I set up a content creator desk?
Choose a desk with enough room for your computer and the tools you use regularly without overcrowding the surface. Position your monitor and other equipment comfortably, keep cables under control, and leave some clear space for writing, planning, or other tasks.
What equipment is essential for content creation?
The answer depends on what you create. A video creator may need a camera or phone, lighting, and a microphone, while a writer or designer may need little more than a reliable computer and comfortable workspace. Start with the equipment that directly supports your primary workflow.
How do I organize a small creator workspace?
Prioritize the equipment you use most often and move everything else into drawers, shelves, or nearby storage. Keep the desk surface as clear as possible, use vertical space when appropriate, and make sure every important piece of equipment has a designated home.
How much does a content creator setup cost?
There is no single amount because creator setups vary considerably. You can start with equipment you already own and improve the workspace gradually as your needs and budget allow. The most important early investments are usually the things that solve genuine workflow or comfort problems.
How can I make my creator setup more productive?
Design the workspace around your actual workflow. Keep frequently used tools accessible, minimize distractions and cable clutter, create repeatable recording or editing arrangements, and reset the workspace between projects. A setup that reduces small sources of friction can make it easier to stay focused.
What should a YouTube desk setup include?
A practical YouTube desk setup may include a computer and monitor, comfortable seating, suitable lighting, a camera or phone, a microphone, and an intentional background. The exact equipment depends on the type of videos you create, so focus on building a setup you can use consistently rather than copying another creator’s studio.
Conclusion
The best content creator setup isn’t the one with the most expensive equipment, the biggest desk, or the most impressive collection of gear. It’s the one that makes your actual creative work easier.
Start with the space you have, build around the content you create, and prioritize the things that genuinely improve your workflow. Keep your equipment organized, make your workspace comfortable, and give yourself enough flexibility to adapt as your work changes.
You don’t need a perfect setup before you start creating. Build what you need today, improve it as you grow, and let your workspace evolve with you.
Continue Exploring
Your workspace is only one part of creating a productive work environment. If you’re building out your creator setup or looking for ways to make your workspace more useful and personal, these guides can help you take the next step.
9 Thoughtful Gift Ideas for Content Creators They’ll Actually Use
Explore practical and thoughtful gift ideas for content creators, including products and ideas that fit naturally into their creative routines.
25 Office Desk Accessories That Make Work Easier & More Productive (2026)
Looking to improve the desk itself? Explore practical accessories that can help with organization, productivity, comfort, and everyday workspace management.


Related posts

Finding the Perfect Gift for a Content Creator Finding the perfect gift for a content creator isn’t always as straightforward as it seems. At first... Continue reading